
How to choose a backpacking and trekking backpack: capacity, torso fit, and test fitting
PrintThe right backpack does not simply hold all your gear. It must fit your torso length, keep the load stable as you walk, and offer access and packing options suited to your journey. Before picking a capacity in litres or a specific brand, clarify what you will carry, for how long, and your mode of transport.
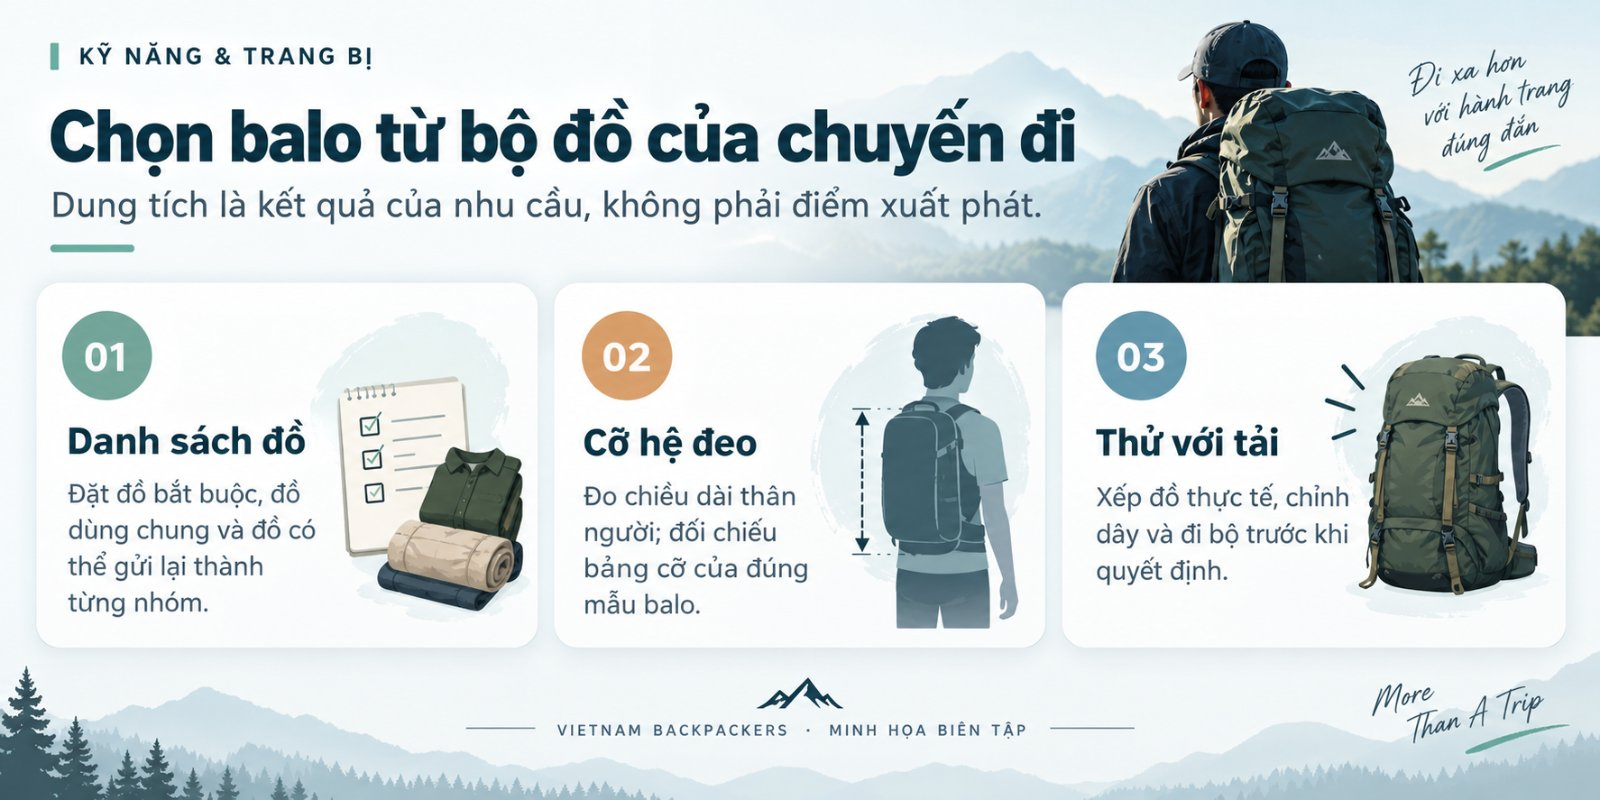
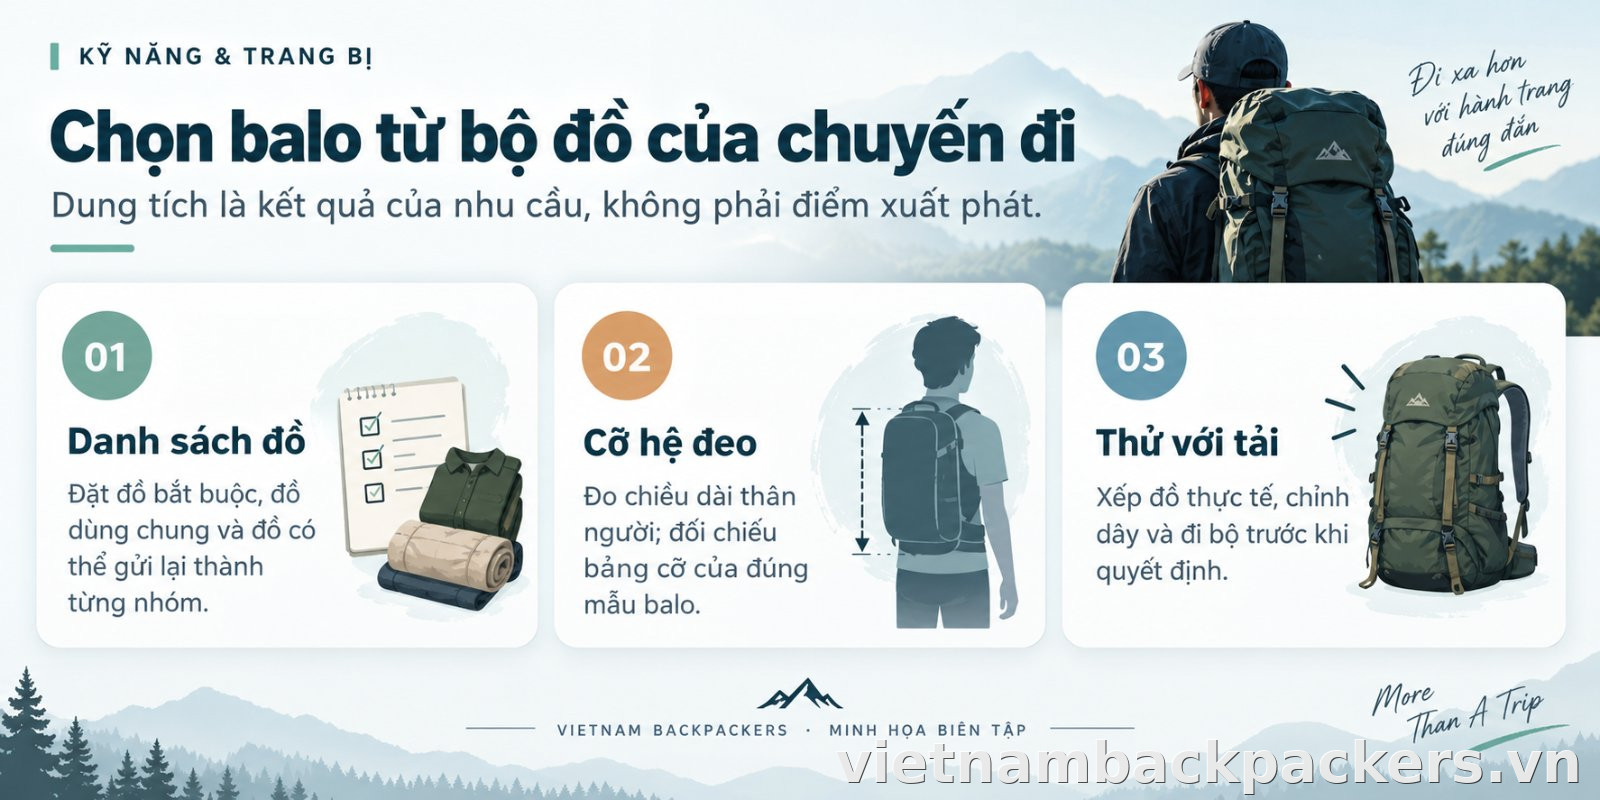
- List all items you plan to bring
- Sort items into categories: personal, shared, and left-behind gear
- Test the load using real gear (sleeping bag, water bottle, clothes)
- Check zippers, straps, and seams before departure
- Dry bags or pack liners to protect electronics and clothing
- Rain cover for the backpack
- Personal first-aid kit
Start with the trip, not the litres
A trip staying in guesthouses is very different from one where you carry your own tent, sleeping bag, and cooking gear. Two people travelling for the same number of days may need vastly different pack volumes depending on their clothing, water, food, and equipment. Therefore, asking “how many litres do I need for a two-day trip?” is only a starting question, not enough on its own.
Lay out all the gear you plan to bring, remove non-essential items, and sort everything into three categories: personal essentials, shared group gear, and items you can leave behind at your accommodation. Only then should you test packing into bags of various capacities. A pack that snugly fits your actual gear list is often far more practical than an oversized bag bought just in case.
| Trip style | Factors determining capacity | Priorities when choosing |
|---|---|---|
| Day walks or day hiking | Water, extra layers, snacks, safety gear, and personal essentials. | Compact, easy access; does not chafe or bounce when walking. |
| Multi-day trips staying in serviced accommodation | Change of clothes, toiletries, personal devices; whether you must carry all gear on every leg. | Good packing organisation and comfort carrying the actual load. |
| Self-supported trekking with sleeping and cooking gear | Volume of tent, sleeping bag, sleeping pad, food, water, and allocated shared gear. | Suspension system rated for the weight, well-fitting hip belt, compartment spacious enough for bulky items. |
| Motorbike travel combined with short hikes | Luggage strapped to the bike versus what needs to be carried on foot. | Sensible gear division; avoid defaulting to wearing the heavy pack during the ride. |
Retailer capacity charts based on trip duration should be used as general reference points, not rigid rules. If your gear does not fit, check which items are overly bulky or can be shared with trip companions before upgrading to a larger capacity.
Back fit: torso length matters more than height
Overall height is not enough to determine harness sizing. When choosing a pack with fixed back sizes or an adjustable harness, measure your torso length according to manufacturer guidelines and match it against the specific model's size chart. REI clearly distinguishes torso length from overall height in its pack fitting guides.
A common measurement method is having someone measure from the C7 vertebra at the base of your neck down to the line connecting the tops of your iliac crests. To find the top point, tilt your head forward slightly and feel for the prominent bony bump at the base of your neck; for the bottom point, rest your hands on top of your hip bones. Run a flexible tape measure along your spine, then compare the result with the guide for the pack you are trying. If you are unsure about the landmarks, ask staff trained in pack fitting rather than guessing from your height.
Next is hip belt fit. The belt should wrap around your hip bones with adequate adjustment room left over; a belt that is pulled all the way tight yet remains loose will struggle to stabilise the load. A backpack's hip belt size should also not be inferred directly from your trouser waist size.
For an adjustable harness, set the torso length before adjusting other straps. If the harness size is incorrect, pulling shoulder straps tighter only masks the loose sensation temporarily without actually making an ill-fitting pack fit properly.
Test-fit with a load, then adjust in sequence
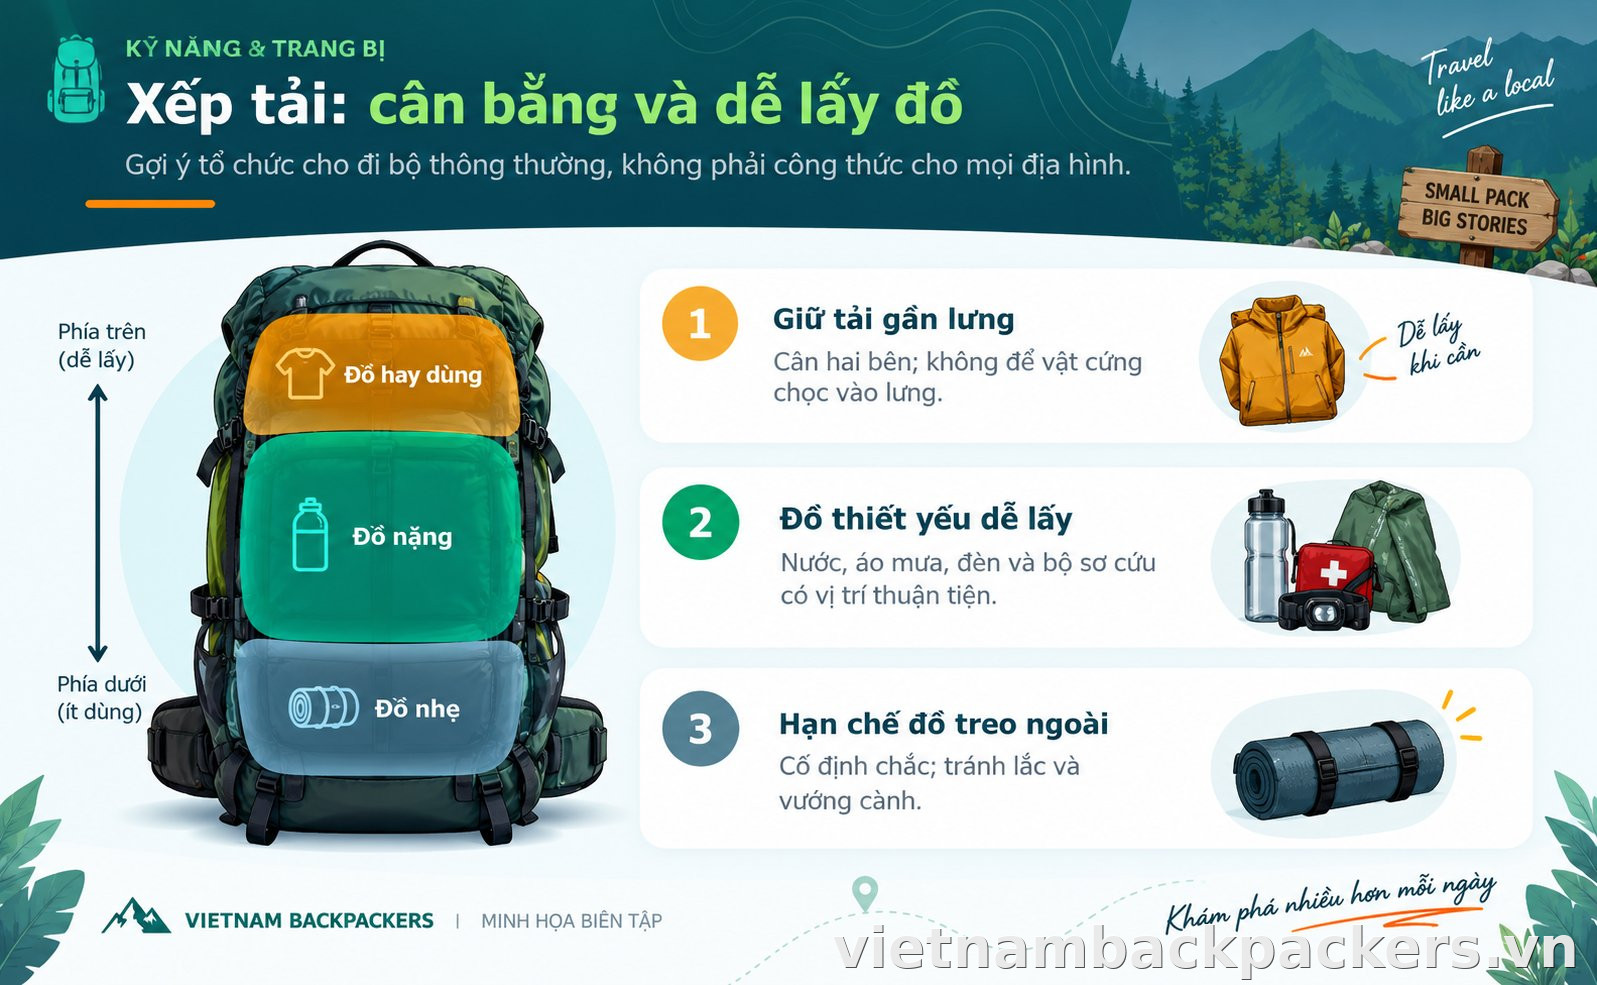
Trying on an empty pack only lets you inspect the openings and get an initial impression. To evaluate the harness, add a load close to your planned trip: neither so light that every pack feels comfortable, nor unrealistically heavy. You can bring specific items to the shop, such as a sleeping bag, tightly rolled clothing, and water bottles, to test the weight. When packing to simulate a realistic load, place the sleeping bag or light gear at the bottom, position heavy items like water bottles close to your spine around the middle of the pack, and tuck rolled clothes around them to keep everything secure, balanced, and free of hard objects poking your back.
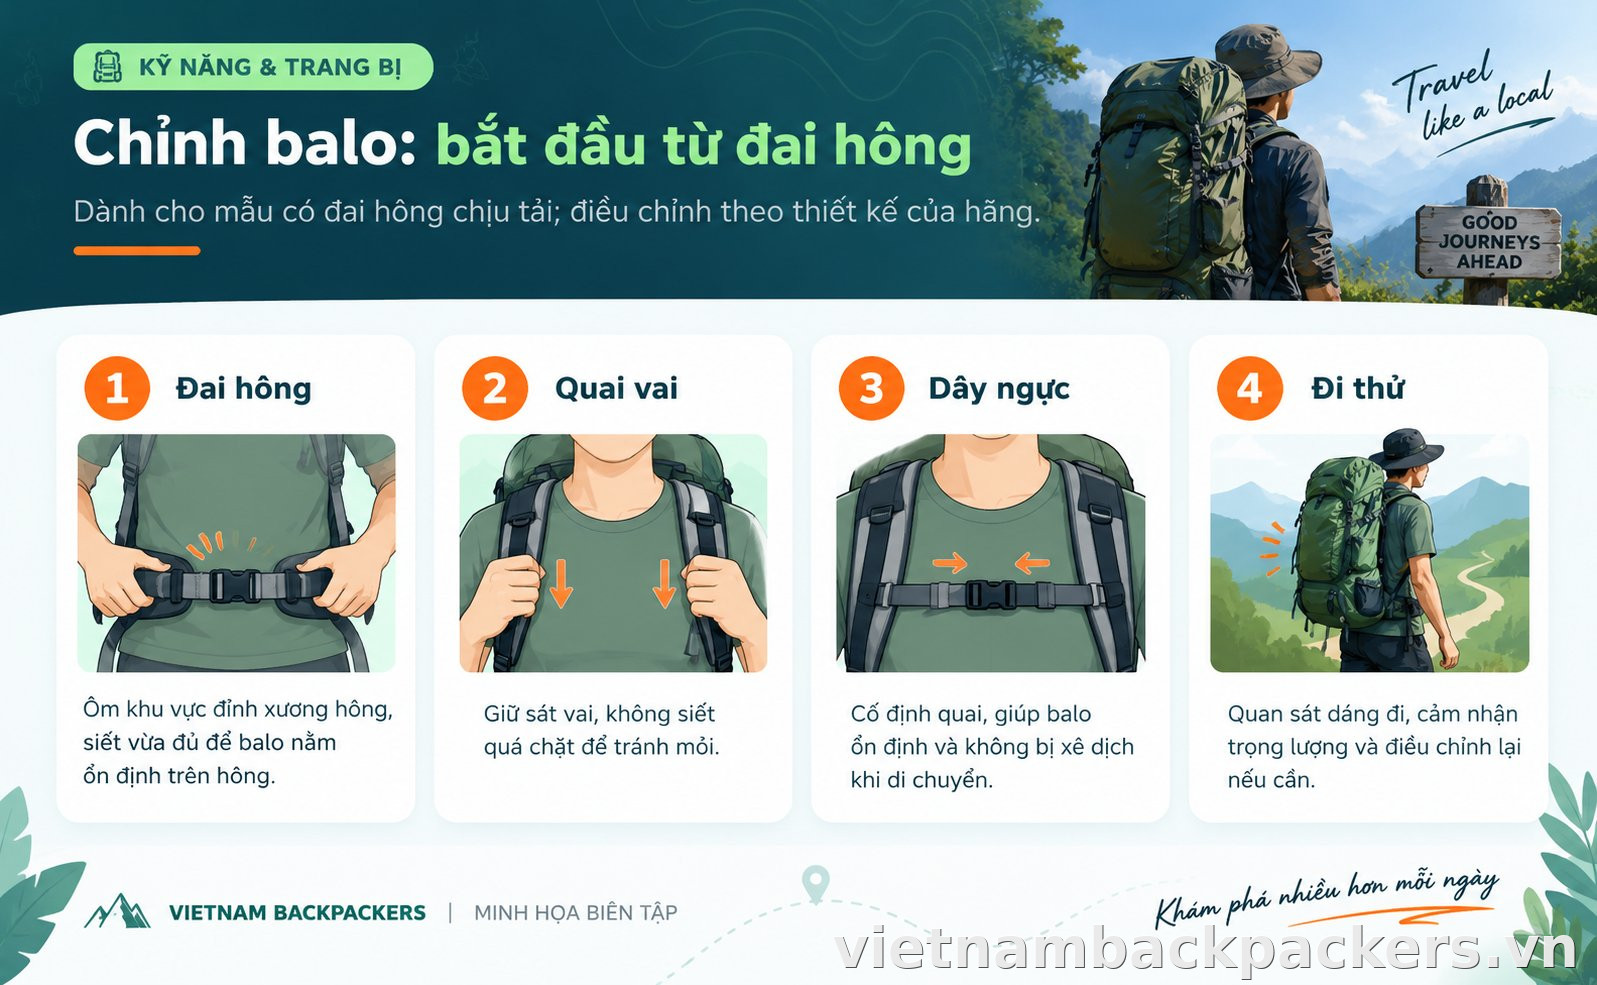
1. Loosen straps and position the hip belt
Loosen all adjustment straps before putting the pack on. Position the padded hip belt over the tops of your hip bones, buckle it, and tighten it snugly. Deuter's guide notes that a belt placed too high can pinch the waist, while one placed too low can rub against the thighs. Do not use the shoulder straps to hoist a poorly positioned hip belt into place.
2. Adjust shoulder straps—do not hang the entire load on your shoulders
Pull the shoulder straps so the pack sits close and stable, but not so tight that your shoulders feel pinched or the hip belt loses its load-bearing role. Check that the padding contours smoothly over your shoulders, without unusual gaps or strap edges digging into your neck. If adjusting continues to cause discomfort, recheck the torso length and hip belt placement.
3. Adjust the sternum strap and load lifters, if available
The sternum strap helps keep the shoulder straps in place; position it comfortably without restricting your breathing. Load lifters on the shoulders or hip belt can pull the pack closer to your body, but their use depends on the pack's design. Avoid applying a fixed strap angle or tension to every pack, particularly smaller daypacks carrying lighter loads.
4. Walk around and test your movement
Walk around the shop or designated testing area, change direction, step up and down a safe low platform, and lean forward gently as if reaching for gear. Pay attention to whether the pack sways, pulls you backward, rubs your neck, pinches your stomach, or causes numbness. A pack that feels fine when standing still but uncomfortable the moment you walk is not a good choice.
Pack your gear so the backpack does not sway behind you
Even a quality harness can feel uncomfortable if the gear inside is poorly balanced. For normal walking routes, keep heavy items close to your back around the pack's middle section, balanced evenly on both sides; lighter, bulky items can sit further from your back. Tighten compression straps so contents do not shift around while you move.
There is no single optimal packing layout for all terrains and harness types. The practical goal is keeping the load stable, preventing hard gear from jabbing your back, and avoiding heavy items leaning to one side. If the pack constantly pulls you backward, check your packing arrangement before assuming the suspension system is at fault.
Frequently used items should be easy to reach: water, rain jacket, an extra layer for rest stops, headlamp, and a personal first-aid kit. Having to empty your entire pack on the trail to find a small item is a clear sign to rethink your packing. Sharp objects, spillable liquids, and electronics should each be protected appropriately according to their needs.
Minimise gear dangling on the outside. Anything lashed to the exterior must be firmly secured so it does not snag branches, bump into walking partners, or throw off your balance. If too much gear ends up strapped outside, reconsider both your packing list and your pack capacity.
Waterproofing: distinguish between fabrics, rain covers, and pack liners
Water-resistant or coated fabric does not mean the entire backpack is completely waterproof. Water can seep through seams, zippers, or open sections depending on construction. When shopping, check product specifications carefully rather than assuming weather resistance from fabric appearance alone.
A rain cover protects the outer surface, while pack liners or dry sacks protect gear groups on the inside. Items that must stay dry, such as spare clothing and electronics, should have dedicated protective layers. When sealing dry sacks, follow the instructions for that specific type; do not assume every roll-top bag is safe for full submersion.
Cold or rainy conditions demand extra warm layers and dry spares, increasing the packed volume required. Choosing a pack tailored to a minimalist dry-season trip and assuming it will suffice for other conditions can leave you short on space. Test with gear suited to your actual trip, not just the neatest gear set that happens to fit.
Key details to check before buying
Buckles and stitching: test fastening and unfastening under load, checking stress points on shoulder straps and hip belt. If a buckle is stiff or awkward in the shop, it will be even more frustrating with wet or tired hands. Do not pick a bag merely because it has numerous buckles and compartments.
Access style: top-loading, front-panel access, or side zippers each have trade-offs. Choose based on how you travel: whether you need quick access to a rain jacket and water on the trail, or a wide opening to organise gear in your room. Practice opening and closing with items inside rather than relying solely on product photos.
Pack weight and usable load: an ultralight pack is not necessarily comfortable with your specific gear, and an heavily padded pack may not fit your body properly. Compare how different models feel carrying the same load, and check manufacturer-rated load limits if available. Avoid relying on a generic body-weight percentage as a one-size-fits-all safety rule.
Repairability and warranty: ask clearly about replaceable hardware, warranty conditions, and service locations. These practical aspects matter far more than claims of being “indestructible.” For borrowed or used packs, inspect buckles, webbing, and stitching well before your trip, not right as you depart.
When to switch choices instead of tightening straps further
You can quickly self-diagnose the fit through practical signs: if the backpack pulls backwards or sways excessively when moving, double-check your packing arrangement and shift heavy items closer to your back; if rubbing or pain in the shoulders and hips persists despite proper packing, it indicates an incorrect suspension harness size. In that case, switch to and try a different model. Cushion shapes, straps, and suspension systems do not suit every body type. Labels such as “men's”, “women's”, or “trekking” represent design guidelines and cannot replace trying the pack on in person.
Do not purchase a backpack that causes pain in the hope that you will get used to it. If you experience numbness, persistent pain, or have medical conditions affecting weight-bearing, stop testing and seek appropriate professional advice; backpack selection guides are not a substitute for medical evaluation. For your upcoming journey, packing lighter and distributing the load reasonably can be far more important than buying a larger pack.
Before deciding, answer these five questions for yourself: does your travel gear fit inside, is the torso size correct, does the hip belt wrap securely, is it comfortable while walking, and can essential items be accessed quickly? If even one question remains unclear, you do not need to make the purchase yet.
Reference links
Frequently asked questions
Can you choose a backpack's torso size based purely on height?
It is not recommended. You should measure your torso length according to the manufacturer's instructions, compare it with the sizing chart for that exact model, and then try it on with a weighted load.
Why must you test a backpack with gear packed inside?
An empty pack does not accurately reflect how the suspension harness bears weight. Use a load close to your trip's weight, adjust the straps, and walk around to identify swaying, friction, or uncomfortable pressure points.
Should you adjust the hip belt or shoulder straps first?
For models with a load-bearing hip belt, position and adjust the hip belt over the crest of your hip bones first, then adjust the shoulder straps, sternum strap, and load-lifters according to the manufacturer's design.
Does waterproof fabric mean the backpack is entirely watertight?
No. Protective performance also depends on seams, zippers, and overall construction. Items that must stay dry should have separate, appropriate protective layers used in accordance with the product instructions.
Members who reacted
Comments
Please follow the community guidelines when sharing your opinion
No comments yet. Be the first to share.
Comment guidelines | VietnamBackpackers
Comment guidelines
01 · Names and profile pictures
- Do not use offensive, confusing or promotional names or profile pictures.
- Registered names must not exceed 30 characters or contain links, phone numbers or email addresses.
02 · How to communicate
- Follow Vietnamese law and the community's standards of conduct.
- Do not use profanity, insults, derogatory language, defamation or personal attacks.
- Do not write entire comments in capitals. Base discussions on facts and respect differences.
03 · Information and content
- Do not post personal contact details, advertising links or commercial websites.
- Do not spam, copy content from other sources or spread misinformation.
- You are responsible for the content of your comments.
Serious or repeated violations may result in a temporary or permanent account suspension.
People who liked this
Report comment
Let the editors know what is wrong with this comment. Your name is not shown to anyone.
 Bé Bụi